Virtual Machines with Ubuntu KVM
This is a guide on setting up Ubuntu to run Virtual Machines with KVM (Kernel-based Virtual Machine).
This turns Ubuntu into a Type-1 hypervisor.
This guide assumes you have some technical knowledge and that you know what Ubuntu, Virtual Machines (VMs) and the command line (CLI) are.
So, let us start with step one, hardware!
Step 1 - Hardware
You will need a server, ideally one with a decent CPU and a good amount of RAM, a quad core and 8GB should really be the minimum if you want to be doing anything useful with your VMs.
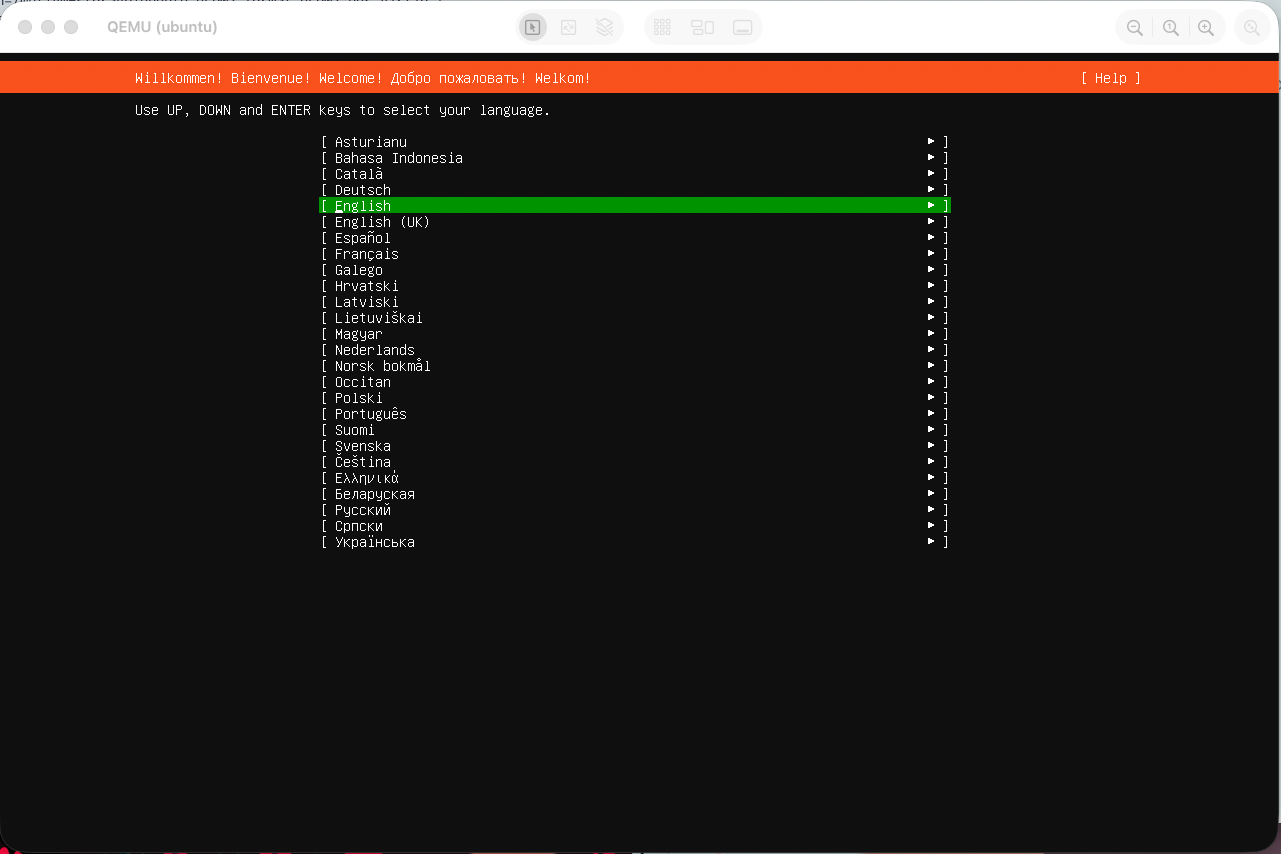
Step 2 - Install Ubuntu
Once you have selected your hardware, we can move on to installing Ubuntu, head over to Ubuntu's website and download the server ISO.
Burn this to a USB stick, I use Rufus or balenaEtcher for this.
Plug this into your server, boot from the USB and follow the steps to install Ubuntu, nothing special her just the out of box defaults.
Wait for it to finish, reboot and login.
Step 3 - Initial Update
It is important to keep your server up to date, so the first commands I always run post install are:
sudo apt update
sudo apt upgrade
sudo reboot
If you want to ensure your system always has the latest security updates, you can install the unattended-upgrades package.
sudo apt install unattended-upgrades
sudo dpkg-reconfigure unattended-upgrades
You can if you wish, configure this package to auto reboot when required, I will not be setting this up since I want to control when my server restarts manually, but if you wanted to configure this, you can in the following file, /etc/apt/apt.conf.d/50unattended-upgrades just look for following options and uncomment the Unattended-Upgrade:: lines.
// Automatically reboot *WITHOUT CONFIRMATION* if
//  the file /var/run/reboot-required is found after the upgrade
//Unattended-Upgrade::Automatic-Reboot "false";

// Automatically reboot even if there are users currently logged in
// when Unattended-Upgrade::Automatic-Reboot is set to true
//Unattended-Upgrade::Automatic-Reboot-WithUsers "true";

// If automatic reboot is enabled and needed, reboot at the specific
// time instead of immediately
//  Default: "now"
//Unattended-Upgrade::Automatic-Reboot-Time "02:00";
And then reload the service to take effect.
sudo systemctl reload unattended-upgradesStep 4 - Secure Server
Once you are up to date and rebooted, we can now do some server hardening, this is a big section, while not required for this guide, I highly recommend you perform the steps as it is good practice.
SSH
If you have SSH running, you should:
- Disable password login, use keys instead
- Disable root login
- Allow set user/group access only
- Change the listening port
- Limit less common features
In your /etc/ssh/sshd_config file, ensure the following options are set as follows:
Port 2222
LoginGraceTime 30s
PermitRootLogin no
MaxAuthTries 3
PubkeyAuthentication yes
PasswordAuthentication no
AllowAgentForwarding no
AllowTcpForwarding no
X11Forwarding no
ClientAliveInterval 300
ClientAliveCountMax 2
PermitTunnel no
To allow a given set of users or groups, add ONE of the following to the file, updating the user and group names to suit your needs:
AllowUsers sam bill alice
AllowGroups sshusers
NOTE: If you define both AllowUsers and AllowGroups you essentially need to define all the users and ensure they are in the group, otherwise access will be denied.
So on a small server, you might just use AllowUsers, but for larger servers with lots of users, AllowGroups would be better.
To create and add users to your sshusers group, use the following commands:
sudo groupadd sshusers
sudo usermod -aG sshusers sam
Now you can restart the SSH service to apply the changes:
sudo systemctl daemon-reload
sudo systemctl restart ssh
Firewall
By default, Ubuntu has no firewall rules defined so all traffic is accepted, this is very risky so lets restrict what can and can't come in, we will do this with UFW (Uncomplicated Firewall) since it is a simple to use, but powerful tool.
You may need to install the package before proceeding:
sudo apt install ufwOnce you have it installed, we can configure and enable it, the first rules we will define are some defaults, these will allow outgoing requests, but deny incoming ones.
WARNING: This is where you can lock yourself out of your server if you are using SSH, by denying all incoming requests, we deny our SSH connection.
Be sure to follow these steps to the letter!
I don't accept any liability for your actions!!
Before proceeding first check the firewall if inactive:
> sudo ufw status
Status: inactive
If it says 'active', run sudo ufw disable
Set the default rules for incoming and outgoing traffic:
sudo ufw default deny incoming
sudo ufw default allow outgoing
Allow SSH traffic on port 2222/tcp, we will also apply a limit filter to this rule, so that if someone (i.e. an attacker) opens too many SSH connections in a short period of time, they will be temporarily blocked.
sudo ufw allow 2222/tcp
sudo ufw limit 2222/tcp
For now this is all we need to expose so we can enable the firewall and check the status.
> sudo ufw enable
> sudo ufw status verbose
Status: active
Logging: on (low)
Default: deny (incoming), allow (outgoing), disabled (routed)
New profiles: skip

To                         Action      From
--                         ------      ----
2222/tcp                   LIMIT IN    Anywhere
2222/tcp (v6)              LIMIT IN    Anywhere (v6)
Fail2Ban
Fail2Ban is a tool which monitors log files and takes action when certain conditions are met, we will use Fail2Ban to monitor our SSH connections for multiple failed attempts, any IP violating the rules will be blocked for 1 hour.
First install Fail2Ban:
sudo apt install fail2banWe will change some of the rules for the sshd jail, to do this create a new file with the command below.
sudo vim /etc/fail2ban/jail.d/sshd.confAdd the following to it:
[sshd]
enabled  = true
port     = 2222
filter   = sshd
logpath  = /var/log/auth.log
maxretry = 5
findtime = 10m
bantime  = 1h
Restart and check status.
sudo systemctl restart fail2ban
sudo fail2ban-client status sshd
Network Hardening
The final step in our server security section is to tightened some of the networking settings in the kernel.
Create a file /etc/sysctl.d/99-hardening.conf and enter the following:
# /etc/sysctl.d/99-hardening.conf
# Kernel & network hardening for Ubuntu
# Includes IPv4 and IPv6 options
# Apply with: sudo sysctl --system

##########################
# IPv4 Hardening
##########################

# Reverse Path Filtering: helps prevent IP spoofing
net.ipv4.conf.all.rp_filter = 1
net.ipv4.conf.default.rp_filter = 1

# Ignore ICMP echo requests to broadcast addresses (prevents smurf attacks)
net.ipv4.icmp_echo_ignore_broadcasts = 1

# Disable accepting ICMP redirects (prevents MITM / route injection attacks)
net.ipv4.conf.all.accept_redirects = 0
net.ipv4.conf.default.accept_redirects = 0

# Disable sending ICMP redirects (prevents server from being used maliciously)
net.ipv4.conf.all.send_redirects = 0
net.ipv4.conf.default.send_redirects = 0

# Enable TCP SYN cookies (mitigates SYN flood DoS attacks)
net.ipv4.tcp_syncookies = 1

# Ignore source-routed packets (rarely used, often malicious)
net.ipv4.conf.all.accept_source_route = 0
net.ipv4.conf.default.accept_source_route = 0

# Ignore bogus ICMP error responses
net.ipv4.icmp_ignore_bogus_error_responses = 1

# Log packets with Martian addresses (invalid/out-of-scope IPs)
net.ipv4.conf.all.log_martians = 1

##########################
# IPv6 Hardening
##########################

# Reverse Path Filtering for IPv6
net.ipv6.conf.all.rp_filter = 1
net.ipv6.conf.default.rp_filter = 1

# Disable accepting ICMP redirects (prevents IPv6 MITM / route injection attacks)
net.ipv6.conf.all.accept_redirects = 0
net.ipv6.conf.default.accept_redirects = 0

# Disable sending ICMP redirects
net.ipv6.conf.all.send_redirects = 0
net.ipv6.conf.default.send_redirects = 0

# Ignore source-routed packets (IPv6 rarely uses source routing)
net.ipv6.conf.all.accept_source_route = 0
net.ipv6.conf.default.accept_source_route = 0

# Log invalid IPv6 packets
net.ipv6.conf.all.log_martians = 1
Save and apply with sudo sysctl --system
Step 5 - Install and Setup KVM
Now that our server is setup and secured, we can start installing the required components for KVM.
Install the required packages:
sudo apt install \
  qemu-kvm \
  libvirt-daemon-system \
  libvirt-clients \
  bridge-utils \
  virtinst
Enable the service, so it runs after a reboot:
sudo systemctl enable --now libvirtd
Assign users to the KVM groups if required, this gives them the ability to run commands to manage the VMs without sudo.
sudo usermod -aG libvirt,kvm sam
The user will need to logout and log back in again for the change to take effect, then run the following command to test, if it looks like below, then all is good.
> virsh list --all
 Id   Name   State
--------------------
Step 6 - Networking Bridge
This step will setup a network bridge on your server, we can then tell VMs to use this interface, this will allow the VM to get an IP address from your networks DHCP server, allowing you to expose services like Nginx just like any other server on your network.
Without this configuration, VMs would only get a NAT IP from the default bridge interface setup by the hypervisor, this would still allow the VM to access the internet, but if you wanted to run a service like Nginx, you would need to mess around with port forwarding.
NOTE: The following configuration might be different from what you see, please double check and ensure you understand what your are changing, doing it wrong can break networking on your server.
Again, I take no responsibility for any breakages.
You may have the following file already, if not check for any other files that might be in the /etc/netplan/ directory.
sudo vim /etc/netplan/50-cloud-init.yaml
On my server, enp3s0 is the physical network interface port, I will disable IP assignment to this and instead link it to the new br0 bridge interface, this will get the network IP configuration going forward.
NOTE: I have both IPv4 and IPv6 on my network.
network:
  version: 2
  renderer: networkd

  ethernets:
    enp3s0:
      dhcp4: no
      dhcp6: no

  bridges:
    br0:
      interfaces: [enp3s0]
      dhcp4: yes
      dhcp6: yes
      accept-ra: yes
      parameters:
        stp: false
        forward-delay: 0
Save the file and apply the new configuration, you will probably find that you loose connection, this is generally because DHCP has given your server a new IP address due to the new bridge interface.
sudo netplan applyIf your system was using 50-cloud-init.yaml it would be a safe bet to tell cloud init (the system which initially configures Ubuntu on boot) to leave networking alone, otherwise it might overwrite our bridge configuration.
This command will write a file to tell cloud init to leave the network config alone.
sudo bash -c "echo 'network: {config: disabled}' > \
  /etc/cloud/cloud.cfg.d/99-disable-network-config.cfg"
Step 7 - Storage
This is another optional section, your storage will likely be completely different to what I have, but in any case, I will document what I have done as it might be helpful to you.
I will be using LVM, I won't explain the ins and outs here, so if you are unfamiliar with it, please do look it up, as it is a modern approach to managing storage.
Ubuntu LV
The first thing I will do is expand my Ubuntu volume to use all available space, Ubuntu tends to use LVM to manage storage these days and when you install Ubuntu it assigns 50% of your disk to the Ubuntu filesystem.
I have multiple disks and one is allocated exclusively to Ubuntu, if I check my LVM status, you can see there is one disk, one volume group and one logical volume.
> sudo pvs
  PV         VG        Fmt  Attr PSize   PFree
  /dev/sda3  ubuntu-vg lvm2 a--  108.73g <54.37g

> sudo vgs
  VG        #PV #LV #SN Attr   VSize   VFree
  ubuntu-vg   1   1   0 wz--n- 108.73g <54.37g

> sudo lvs
  LV        VG        Attr       LSize   Pool Origin Data%  Meta%  Move Log Cpy%Sync Convert
  ubuntu-lv ubuntu-vg -wi-ao---- <54.37g
My ubuntu volume as expected is around half my total storage, let's expand this to 100%.
sudo lvextend -l +100%FREE /dev/ubuntu-vg/ubuntu-lv
sudo resize2fs /dev/ubuntu-vg/ubuntu-lv
We can now check and see our Ubuntu volume is using all the space available.
> sudo lvs
  LV        VG        Attr       LSize   Pool Origin Data%  Meta%  Move Log Cpy%Sync Convert
  ubuntu-lv ubuntu-vg -wi-ao---- 108.73g

> df -h
Filesystem                         Size  Used Avail Use% Mounted on
tmpfs                              3.2G  1.4M  3.2G   1% /run
efivarfs                           128K   53K   71K  44% /sys/firmware/efi/efivars
/dev/mapper/ubuntu--vg-ubuntu--lv  107G   15G   88G  15% /
tmpfs                               16G     0   16G   0% /dev/shm
tmpfs                              5.0M     0  5.0M   0% /run/lock
/dev/sda2                          2.0G  103M  1.7G   6% /boot
/dev/sda1                          1.1G  6.2M  1.1G   1% /boot/efi
tmpfs                               16G     0   16G   0% /run/qemu
tmpfs                              3.2G   16K  3.2G   1% /run/user/1000
VM Storage LV
For VM storage, I have 5x 240GB SSDs, I will pool these together into a vm-storage LV with RAID 5 to give me just under 900GB of space.
First you will want to check the disks are empty, you can use the lsblk command for this:
> lsblk -f
NAME                      FSTYPE      FSVER    LABEL UUID                                   FSAVAIL FSUSE% MOUNTPOINTS
sda
├─sda1                    vfat        FAT32          9399-BD24                                   1G     1% /boot/efi
├─sda2                    ext4        1.0            78b37a60-f3d2-44c6-8b89-74d6e67f35ef      1.7G     5% /boot
└─sda3                    LVM2_member LVM2 001       aPYQHx-u6nC-cgJP-3mqZ-JB6y-g14o-jSHzQq
  └─ubuntu--vg-ubuntu--lv ext4        1.0            6c93a5ee-ac95-456b-9aaf-4ad9a25f8bfa     87.6G    13% /
sdb
sdc
sdd
sde
sdf
We can see that sda is our Ubuntu drive and the others have no partitions, if they did you will want to run the wipefs command against them to remove any existing filesystems, to be safe, I will run the following commands anyway.
sudo wipefs -a /dev/sdb
sudo wipefs -a /dev/sdc
sudo wipefs -a /dev/sdd
sudo wipefs -a /dev/sde
sudo wipefs -a /dev/sdf
We can now create our PV (Physical Volume).
> sudo pvcreate /dev/sdb /dev/sdc /dev/sdd /dev/sde /dev/sdf
  Physical volume "/dev/sdb" successfully created.
  Physical volume "/dev/sdc" successfully created.
  Physical volume "/dev/sdd" successfully created.
  Physical volume "/dev/sde" successfully created.
  Physical volume "/dev/sdf" successfully created.

> sudo pvs
  PV         VG        Fmt  Attr PSize   PFree
  /dev/sda3  ubuntu-vg lvm2 a--  108.73g      0
  /dev/sdb             lvm2 ---  223.57g 223.57g
  /dev/sdc             lvm2 ---  223.57g 223.57g
  /dev/sdd             lvm2 ---  223.57g 223.57g
  /dev/sde             lvm2 ---  223.57g 223.57g
  /dev/sdf             lvm2 ---  223.57g 223.57g
And now the VG (Volume Group).
> sudo vgcreate vm-vg /dev/sdb /dev/sdc /dev/sdd /dev/sde /dev/sdf
  Volume group "vm-vg" successfully created

> sudo vgs
  VG        #PV #LV #SN Attr   VSize   VFree
  ubuntu-vg   1   1   0 wz--n- 108.73g    0
  vm-vg       5   0   0 wz--n-   1.09t 1.09t
And now the LV (Logical Volume).
> sudo lvcreate --type raid5 -i 4 -l 100%FREE -n vm-storage vm-vg
  Logical volume "vm-storage" created.

> sudo lvs
  LV         VG        Attr       LSize   Pool Origin Data%  Meta%  Move Log Cpy%Sync Convert
  ubuntu-lv  ubuntu-vg -wi-ao---- 108.73g
  vm-storage vm-vg     rwi-a-r--- 894.25g                                    1.12
We can now create a file system on this new LV, we will use XFS since it provides better performance for VM workloads.
sudo mkfs.xfs /dev/vm-vg/vm-storageFinally, we need to mount the filesystem, to make it available after rebooting, we will write an entry to /etc/fstab, first we need to find the UUID for our storage.
> sudo blkid /dev/vm-vg/vm-storage
/dev/vm-vg/vm-storage: UUID="e5eb649e-a412-4a67-b9a4-f72e21201796" BLOCK_SIZE="512" TYPE="xfs"
We can now put this into /etc/fstab
UUID=e5eb649e-a412-4a67-b9a4-f72e21201796 /mnt/vm-storage xfs defaults 0 0
Create the mount point directory, reload the daemon and mount.
sudo mkdir /mnt/vm-storage
sudo systemctl daemon-reload
sudo mount -a
Step 8 - Install VMs
I know it took a while to get to this final stage, but, it is very important that you know how to harden your server and that you have a solid base to built upon.
Now let's get some VMs running!
I will show two ways, manual and cloud init, manual install will be similar to how you go about installing say your desktop OS, it requires you to do some clicking and keyboard typing, cloud init on the other hand is how the data centres do it, this is unattended one command setup, great for automation.
Manual
The first thing we will need is an ISO, let's download the Ubuntu 24.04.3 server image.
sudo mkdir -p /var/lib/libvirt/images/ubuntu
cd /var/lib/libvirt/images/ubuntu
sudo wget https://mirror.server.net/ubuntu-releases/24.04.3/ubuntu-24.04.3-live-server-amd64.iso
Now we need to create a disk for our virtual machine, I will create a 40GB disk, it is better to start small and scale up as needed.
QEMU is a utility for creating, converting, and managing virtual machine disk images, qcow2 stands for Copy-On-Write version 2 and is a disk file format which supports snapshots, compression, and encryption.
sudo qemu-img create -f qcow2 \
  /mnt/vm-storage/ubuntu.qcow2 40G
Now the juicy bit, let's install our VM!
This command will create a VM called ubuntu with 2 vCPUs and 4GB RAM, it will be attached to our bridge interface meaning it will pull an IP from our networks DHCP server.
The last important thing here is the --graphics line, this is how we can view the screen to run through the Ubuntu installer, it will setup VNC on 0.0.0.0 and define a password of changeme.
This is only a testing server, you should configure it to be something more secure and also limit the connection to a trusted IP, or connect via an SSH tunnel.
You may also need to allow a port in your firewall depending on the way you wish to set this up!
sudo virt-install   \
  --name ubuntu \
  --ram 4096 \
  --vcpus 2 \
  --cpu host \
  --os-variant ubuntu24.04 \
  --disk path=/mnt/vm-storage/ubuntu.qcow2,format=qcow2,bus=virtio \
  --cdrom /var/lib/libvirt/images/ubuntu/ubuntu-24.04.3-live-server-amd64.iso \
  --network bridge=br0,model=virtio \
  --graphics vnc,listen=0.0.0.0,password=changeme \
  --console pty,target_type=serial \
  --noautoconsole
If you don't see any errors then the VM is now booting and waiting for us to install Ubuntu, but first we need to find out the port VNC is listening on.
> sudo virsh vncdisplay ubuntu
:0
This means 5900 + 0, so 5900 in this case.
I will be connecting directly to this port so I will add a firewall rule to allow this.
sudo ufw allow 5900I can now connect to VNC using a viewer, in my case on MacOS, I can use the Finders 'Connect to server' feature to connect to vnc://10.111.1.146:5900
Once you have finished installing and are told to remove the install media and reboot, go ahead and tell it to reboot, the VM should just power off and stay off for now.
Run the following commands to remove the install media, update the installer disk identifier if it's different for you.
> sudo virsh domblklist ubuntu
 Target   Source
-------------------------------------------------------------------------------
 vda      /mnt/vm-storage/ubuntu.qcow2
 sda      -

> sudo virsh detach-disk ubuntu sda --config
You can now start your VM, connect to it via VNC or SSH if you installed the OpenSSH server during the Ubuntu Install, and configure your server to your needs.
sudo virsh start ubuntuRemoving VNC Config
If however, you want to solely use SSH or the hosts CLI to access the VM, you might want to remove the VNC config.
We need to make an update to the Grub configuration inside our new VM, so once it has started, connect to it and open the Grub config file.
sudo vim /etc/default/grubLook for a line stating with GRUB_CMDLINE_LINUX="" and update it to the following:
GRUB_CMDLINE_LINUX="console=tty0 console=ttyS0,115200n8"
Save the file, update Grub and reboot.
sudo update-grub
sudo reboot
Before we remove the VNC config, first check you can access the VM via the CLI console, you will need to press 'Enter' to bring up the login prompt.
> sudo virsh console ubuntu
Connected to domain 'ubuntu'
Escape character is ^] (Ctrl + ])

testing-vm login:
If this works, let's remove the VNC configuration and close the port we previously opened for tight security.
sudo virsh shutdown ubuntu

# Wait for the VM to shutdown
sleep 10
# or check with
sudo virsh list --all

sudo virsh dumpxml ubuntu | \
  xmlstarlet ed -d "/domain/devices/graphics" | \
  sudo virsh define /dev/stdin

sudo ufw delete allow 5900

sudo virsh start ubuntu
sudo virsh console ubuntu
You should now only have host console access and SSH if you set that up, your VM is now ready to do as you wish with it.
Cloud init
First we need to download the Ubuntu cloud image, you can find these at the following website, https://cloud-images.ubuntu.com, we will be downloading the Noble image which is Ubuntu 24.04.
sudo mkdir -p /var/lib/libvirt/images/ubuntu
cd /var/lib/libvirt/images/ubuntu
sudo wget https://cloud-images.ubuntu.com/noble/current/noble-server-cloudimg-amd64.img
For this install type, we also need another image which contains information about the new VM and how to set it up, this is what the cloud image will use during installation, we will call this the seed.iso
Let's create another directory to store this seed image and create the two required files, this directory can be created anywhere, I'm going to keep it in the libvirt directory for now.
sudo mkdir -p /var/lib/libvirt/autoinstall/ubuntu
cd /var/lib/libvirt/autoinstall/ubuntu
sudo touch user-data meta-data
In the meta-data file, enter the following, this will give the VM an instance ID and indicate the local hostname.
instance-id: ubuntu
local-hostname: ubuntu
In the user-data file, enter the following, be sure to update file to reflect your account, so change the SSH key and password, this will create a nice harden base server for you to start building on.
# Generate password hash with either
openssl passwd -6
mkpasswd -m sha-512

# Create SSH key
ssh-keygen -t ed25519 -f ~/.ssh/mykey
#cloud-config
hostname: ubuntu
timezone: Europe/London
users:
- name: ubuntu
sudo: ALL=(ALL) NOPASSWD:ALL
shell: /bin/bash
ssh_authorized_keys:
- ssh-ed25519 AAAAC3N....YDOXohF0 sam@localhost
lock_passwd: false
passwd: "$6$xTLIKPQsr....Um02X60"
ssh_pwauth: false
disable_root: true
package_update: true
package_upgrade: true
package_reboot_if_required: false
packages:
- qemu-guest-agent
- vim
- curl
- htop
- git
- ufw
locale: en_GB.UTF-8
keyboard:
layout: gb
variant: ''
network:
version: 2
ethernets:
enp1s0:
dhcp4: true
dhcp6: true
write_files:
- path: /etc/ssh/sshd_config.d/99-hardening.conf
permissions: '0644'
content: |
PasswordAuthentication no
PermitRootLogin no
PubkeyAuthentication yes
ChallengeResponseAuthentication no
UsePAM yes
X11Forwarding no
AllowTcpForwarding no
AllowAgentForwarding no
runcmd:
# SSH
- systemctl restart ssh
# Firewall
- ufw default deny incoming
- ufw default allow outgoing
- ufw allow ssh
- ufw --force enable
# Lock cloud-init after first boot
- touch /etc/cloud/cloud-init.disabled
# Custom
- systemctl enable --now qemu-guest-agent
- cp -a /etc/skel/. /home/ubuntu/
- chown -R ubuntu:ubuntu /home/ubuntu
final_message: |
Cloud-init complete.
SSH keys only, firewall enabled, system hardenedWe can now generate our seed.iso with the following command.
sudo apt install cloud-image-utils
sudo cloud-localds seed.iso user-data meta-data
We now need to create our servers disk, since we are using the cloud image, we cant install it like a normal OS, this is because its already technically installed, so what we need to do is copy the ISO into our servers disk, we can then size it to whatever we decide.
sudo qemu-img create -f qcow2 \
  -b /var/lib/libvirt/images/ubuntu/noble-server-cloudimg-amd64.img \
  -F qcow2 \
  /mnt/vm-storage/ubuntu.qcow2

sudo qemu-img resize /mnt/vm-storage/ubuntu.qcow2 40G
Now that we have our servers disk and seed image, we can create the VM.
This command will create a VM called ubuntu with 2 vCPUs and 2GB RAM, it will be attached to our bridge interface meaning it will pull an IP from our networks DHCP server.
sudo virt-install \
  --name ubuntu \
  --ram 2048 \
  --vcpus 2 \
  --cpu host \
  --os-variant ubuntu24.04 \
  --disk path=/mnt/vm-storage/ubuntu.qcow2,format=qcow2,bus=virtio \
  --disk path=/var/lib/libvirt/autoinstall/ubuntu/seed.iso,device=cdrom,readonly=on \
  --network bridge=br0,model=virtio \
  --import \
  --noautoconsole
That's it really, we can see if we can connect to it and login with the details we defined in the seed data earlier, if you connect to it just after running the above command, you should see it outputting the initial setup, this is cloud-init doing it job! Very cool!
> sudo virsh console ubuntu
Connected to domain 'ubuntu'
Escape character is ^] (Ctrl + ])
.
.
.
[   57.428420] cloud-init[1255]: Cloud-init complete.
[   57.428880] cloud-init[1255]: SSH keys only, firewall enabled, system hardened
[  OK  ] Finished cloud-final.service - Cloud-init: Final Stage.

ubuntu login: ubuntu
Password:
Welcome to Ubuntu 24.04.4 LTS (GNU/Linux 6.8.0-94-generic x86_64)
.
.
.
We can remove the seed.iso now since it is no longer required, to do this shutdown the VM, detach the disk and start the VM.
> sudo virsh shutdown ubuntu
Domain 'ubuntu' is being shutdown

> sudo virsh domblklist ubuntu
 Target   Source
--------------------------------------------------------
 vda      /mnt/vm-storage/ubuntu.qcow2
 sda      /var/lib/libvirt/autoinstall/ubuntu/seed.iso

> sudo virsh detach-disk ubuntu sda --config
Disk detached successfully

> sudo virsh start ubuntu
Domain 'ubuntu' started
That's it, you now have a preconfigured Ubuntu 24.04 server running and ready for building upon further.
Step 9 - VM Management Commands
This is not an exhaustive list of commands available but it should be enough to get you by day by day.
List VMs
The following command will list all the VMs on the system, showing the name and state.
> sudo virsh list --all
 Id   Name     State
------------------------
 2    ubuntu   running
VM States
The following commands will manage the state of the given VM.
sudo virsh start ubuntu
sudo virsh reboot ubuntu
sudo virsh shutdown ubuntu
sudo virsh destroy ubuntu
VM Console
This command will connect you to the VMs console, essentially the same as if you were standing at the servers keyboard.
sudo virsh console ubuntuDelete VM
This command will delete the VM, and the attached disks if the option is defined.
# Delete VM only
sudo virsh undefine ubuntu

# Delete VM and disks
sudo virsh undefine ubuntu --remove-all-storage
Snapshots
Snapshots let you create restore points on your VM, for example, you might define an "Initial install" or a "Release 1.2.3", if needed you can quickly revert to a previous state.
# Create a data safe snapshop
# Includes disk and memory
sudo virsh snapshot-create-as \
  ubuntu \
  initial_state \
  --atomic

# List all snapshots for VM
sudo virsh snapshot-list ubuntu

# Revert a VM to the given snapshot
sudo virsh snapshot-revert ubuntu initial_state

# Delete the given snapshot
sudo virsh snapshot-delete ubuntu initial_state

# Detailed info about the snapshot
sudo virsh snapshot-current ubuntu
Step 10 - Away you go
You should now have a working host with at least one VM running, from here it's up to you on how you go forward.
Thank you for reading this post and good luck, go create something amazing!
Enjoyed this post?
If so, please consider buying me a chilled pint to sip while writing the next one!
Gift a pint